|
|
| How
Do I Make ... ? |
Butter or Lie Yao |
|
The processes for making: Butter, Cheese, Yogurt and similar items such as buttermilk and cottage cheese are all inter-related. Lie Yao simply means milk fat; fat and oil are usually interchangeable words.
Butter and cottage cheese are quite simple, if hard
physical work; whilst cheese is a bit more tricky and
does take months for a mature version.
You will not be able to buy any of the raw ingredients
in a Chinese supermarket, although the finished imported
product is often available at astronomical prices.
To solve this, simply contact your local Chinese Dairy
- they do exist, and would probably deliver ordinary
fresh milk to your door daily - if only you knew about
this. Every small town has at least one Dairy, even
in Guangdong.
However, to make any of these related items you need
whole milk cream that is not pasteurised.
Simple Butter Recipe 1
- Simple guide from UK.
Simple Butter Recipe 2
- Picture walkthrough with tips.
To make butter you will need the cream of the milk -
and by beating double or whipping cream for far too
long you will get butter. It is that simple!
Well, there is a little more to it to add taste (Salt)
and colour (Additives).
Prep Time: 1 minute
Beating Time: 30 to 60 minutes by hand - or use a Kenwood
Chef on low setting
Recipe Source:
|
|
| Ingredients: |
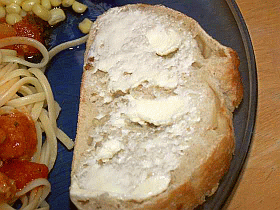
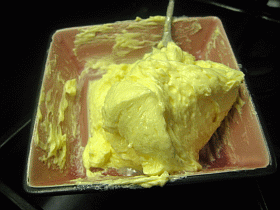
|
Double or Whipping Cream
(Do not use Single Cream).
|
Essentials:
•
Beating or shaking it for a very long time!
• Water for rinsing buttermilk from butter.
|
Equipment:
• Mixer or jar for shaking.
•
Cheesecloth or similar for straining
|
Tips:
• Straining the buttermilk from the butter
is a crucial step.
If you do not do this then your butter will become
rancid in the refrigerator within a few days.
Do this well and it will keep for a week - or
freeze for 3-months +
• Many people
advise using 'iced water' or ice cubes during
the straining process, as temperature + repetition
is key to removing all the buttermilk! |
Method:
Making Your Own Butter
Making butter is remarkably easy and very satisfying.
In recent years the concerns about fats, cholesterol
and heart disease have made butter and almost taboo
food but I believe that, like most natural foods,
in moderation it will do no harm. I have even heard
that the fats in low fat spreads are more harmful
than the natural animal fats in butter.
With all this conflicting information I think you
can argue anything you eat is bad for you!
OK – back to butter.
Butter Making - Ingredients
The 'ingredients' for butter are simply cream and
possibly a little salt. I think you can make butter
from goat's milk, but it takes a different method
so I'm sticking to what I know. Making butter from
cow's cream.
Unless you have your own cow or access to a dairy,
you are not going to save any money by making your
own butter. As with most commodity products in the
supermarket, the retail price of butter is less than
you can buy the raw materials for.
Having said that, sometimes you will find the supermarket
has reduced it's cream as it approaches the end of
it's shelf life. One Christmas Eve we found our supermarket
had a load of cream reduced to 5p for a large tub.
I've never managed to freeze cream so making butter
was the ideal way to take advantage of a bargain and
store it for use in the future.
You need double cream or whipping cream to make butter,
single cream is just too thin.
Butter Making - Equipment
You do not need much equipment to make butter at
home, a bowl and large jar with a lid being the minimum.
If you have a food processor or an electric whisk
then the task will be much easier.
Butter Making - Method
Let the cream reach room temperature, around 20 C
(68 F) is ideal – this is critical. Don't heat it
but leave the pots out of the fridge for a good few
hours to warm up. If you have a cold kitchen, put
them into the living room to warm up.
Now we are ready to make butter.
With a jar you need to half fill the jar, put the
lid on and shake it for anything between half an hour
and an hour. This is hard work, especially for any
quantity and I've not tried it myself.
With a food processor or an electric whisk, proceed
as if you are making whipped cream. In the processor,
use the plastic blades if you have them. I'm told
the Kenwood 'K' beater is the best tool if you are
lucky enough to have one.
It will go through the usual stage of starting to
form firm peaks and then it becomes quite stiff. At
this point you might like to reduce the speed of your
whisk because when it goes it happens very fast.
All of a sudden the cream goes a bit yellow in colour
and then little bits of butter appear and a thin liquid,
the buttermilk. Just seconds later, the butter seems
to clump and is separated from the buttermilk. If
your whisk is on high speed you are now redecorating
the kitchen, hence my suggesting you reduce speed
to a minimum.
Buttermilk
Drain the buttermilk off – you can use this in baking,
cooking or make your cat very happy.
Washing the Butter
You need to get all the buttermilk out of the butter
or the butter will quickly go rancid. Add clean cold
water to the butter in the blender and operate on
low speed for a minute. You need the water to be cold
or you melt the butter, which will then run off with
the water.
Repeat the washing process until the water is really
clean, this can be seven or more times but I can't emphasize
enough how you do need to make sure the water is clear.
Pressing the butter
You now need to get the water out of the butter.
In the old days they had special wooden paddles to
press and shape the butter but you can use your hands
and the back of a spoon to do this. When you have
the water out you are ready for the next stage.
Salting or Flavouring the Butter.
Homemade butter can be stored for at least three
months in a freezer. I do know that commercial butter
stores for much longer but I think they add stabilisers
or something to it, which enables longer storage.
If you are going to freeze the butter, don't salt
or flavour it. The freezing process enhances the saltiness
or flavour and you may well find it tasted fine on
the way in but is too salty after freezing.
To salt do not add more than a small half teaspoon
for each half pound (250 gr) – half that amount suits
me but I don't take a lot of salt.
You can also add crushed garlic or dried herbs to
make flavoured butter if you wish at this stage.
Shaping the Butter
If you have salted or flavoured the butter, you will
need to mix it thoroughly and then you can shape it.
I prefer a roll of butter rather than the traditional
box shape. You can then wrap the butter to keep in
the fridge or to freeze if you have a lot.
I find cling film ideal, but I've been told you can
use greaseproof paper.
Conclusion
For the ordinary person, making butter at home with
ordinary kitchen equipment is very easy and a great
way to store bargain cream. Like most things made
yourself, it tastes wonderful and you control the
whole process.
Making your own butter and cheese are amongst the self-sufficiency
topics covered in our book, Low Cost Living. For more
information on the book see
Low
Cost Living |
| |
| Additional Recipes and Information: |
|
FoodRenegade.com
We discovered this excellent website after publishing
our butter making page, and think many of you will prefer
it to the version above? The basic principle is the
same of course.
This website is clean, and has great pictures of each
part of the process - which is fantastic if you want
to see a visual comparison of what you are trying to
do yourself at home. Click
here for details |
| |
| Tips: |
|
| 1. Use iced water (or
ice when using a Food Processor) to completely remove
the buttermilk from the butter. Keep doing this until
the liquid is completely clear. |
|
2. Add salt and any
herbs or garlic in small quantities after
you have made the butter - at least until you perfect
the recipe.
I add a whole wronky (Smelly) wardrobe of garlic to
my half pound of butter, but then I like it strong!
Note: 'A Wardrobe of Garlic' is British
humour, and a pun on the place you hang your 'clothes'
vs 'cloves' of garlic.
It was invented by Marc Dudek and myself one lazy afternoon
in the Nag's Head pub in Stafford, UK during the 70's;
whilst we were inventing recipes concerning how to eat
garlic for breakfast...
... and has since become a minor but mainstream British
slang word. |
|
| 3. When doing this by
hand, use a stout plastic jar with a cleansed 'marble'
inside. Fill this with cream and give it to your kids
to play with - they will adore the rattling sound, so
you can make a game out if it for them. |
|
| 4. As a rough generalisation:
You will end up with about half the volume of butter,
compared to the original amount of cream used. |
|
| 5. Natural butter tends
to be pale ivory in colour, so if you want something
more yellow in appearance then experiment by adding
a little food colour or saffron - but not too much! |
|
This information is as supplied by ourselves, and ably
supported by our friends and various internet portals.
In addition we personally wish to thank Allotment
Vegetable Growing.org.uk and FoodRenegade.com
for sharing with us all their excellent skills and recipes. |
|
| Search
this Website |
|
|
| Boy
Cooking |
 |
| Béchamel Related |

|
| Descriptions |
|
| Chinese Recipes |
|
|